Table of Contents
POV: You need to maintain a website that implements Adobe Launch (or probably any tag manager). The tag is a huge mess and contains fragmented rules and no clear naming system. Adding features or fixing bugs can be a real pain in the ass: Finding the right rule, modifying the custom code in a not so convenient code editor, saving the rule, re-building the library, re-loading the page, testing and seeing, that something is still missing, back to step 1. How can you improve that?
Disclaimer: If you are a web developer, this should be an old hat. If you are a developer and never heard about local overrides, you should continue reading.
Have you met “Local Overrides”?
Solution: Well, you could choose the sophisticated way: Host the tag manager for yourself, use some kind of version control system to synchronize the source code with your local development environment. If this is not possible the solution is “local overrides in Chrome”. Chrome introduced this feature with Chrome 65 in 2018 and it allows you to, surprise, override remote resources with local files.
Cut it, tell me how!
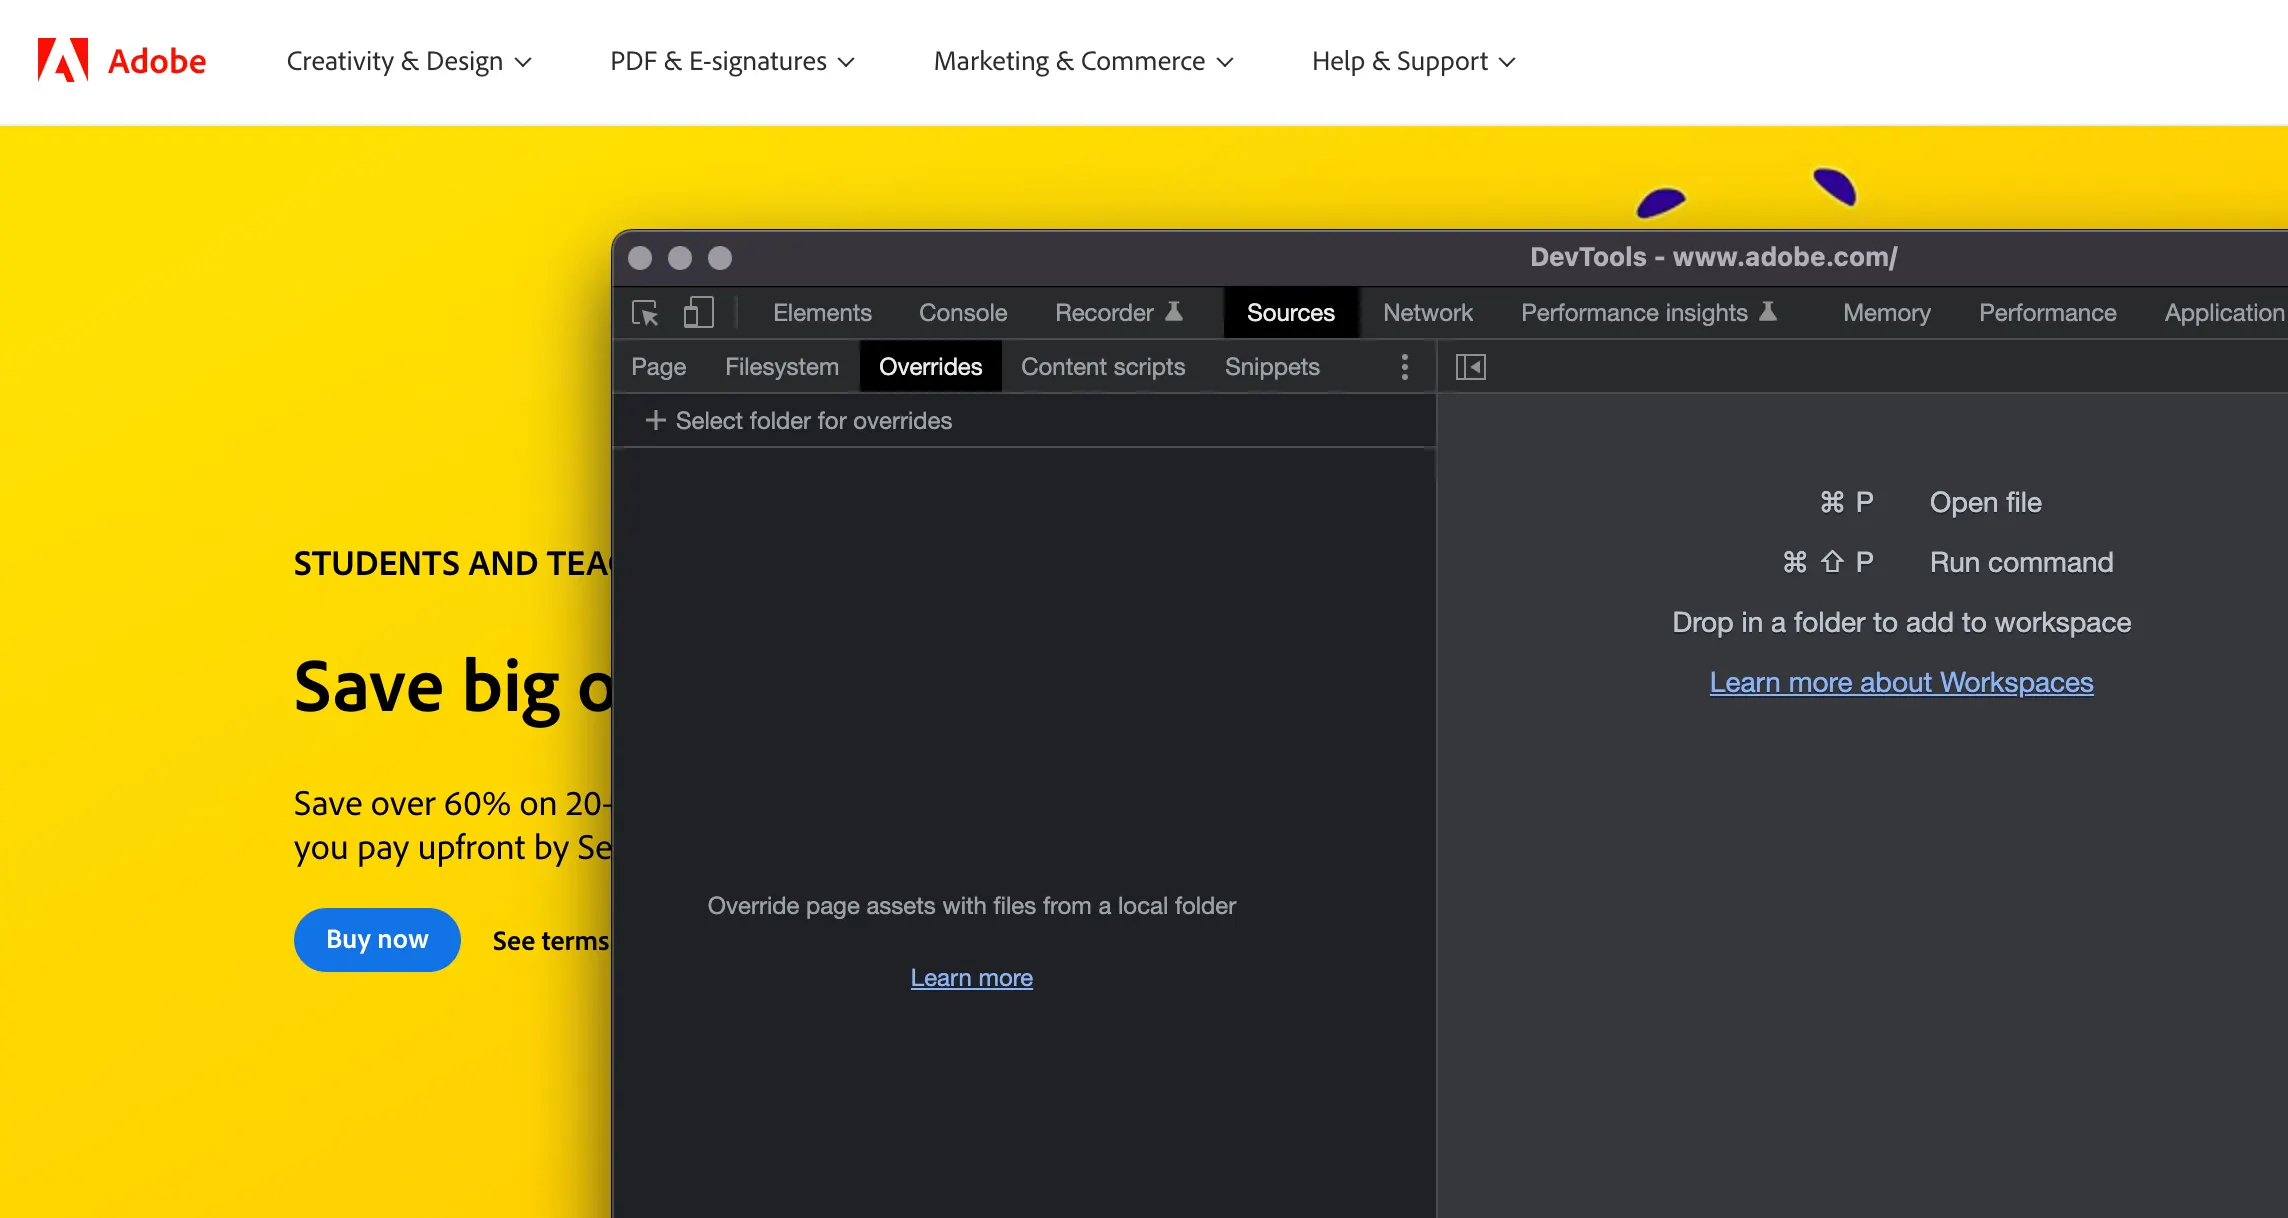
- Go to site that contains your tag, open the DevTools of Chrome and go to the “Sources” area and then select the “Overrides” tab:
Click the area saying “+ Select folder for overrides” and choose your folder wisely. You probably need to confirm this with your operating system.
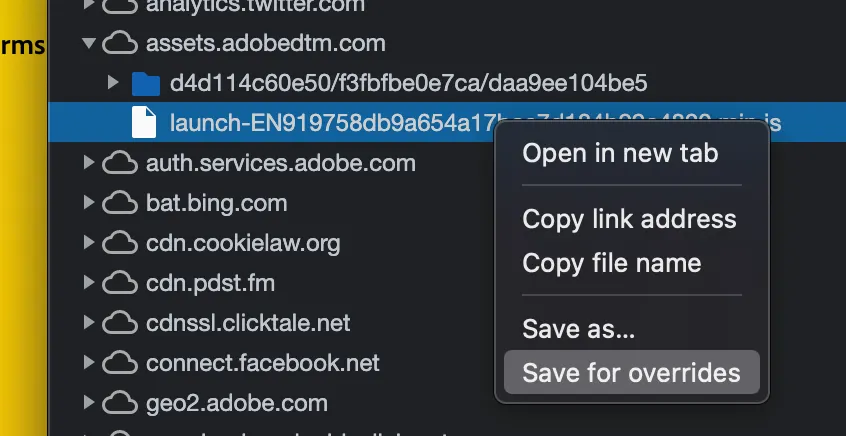
Now select the “Page” tab to the left, which should show you all the resources this page uses. Look for a subfolder called “assets.adobetm.com” — the host where Adobe’s tags are comming from. Inside that folder you’ll find a resource like this:
1launch-EN919758db9a654a17bac7d184b99c4820.min.js
This is the tag Adobe uses on it’s own site. Right click this item and select “Save for overrides”:
Now switch back to the “Overrides” tab and open the folder you just added. You should see a sub folder with the host name and within that the resource you just “saved for override”.
Now you may navigate to the folder in your file system and edit it with your preferred code editor, e.g. Visual Studio Code. But wait, there’s one step missing: You just saved the minimized version, which is kind of difficult to handle.
Go back to the resource in the “Page” tab, right click it and select “Open in new tab”. From the address bar remove the “min” from the resource name and load the “un-minified” ressource.
Copy the content to the clipboard, paste it into the locally saved, minimized version.
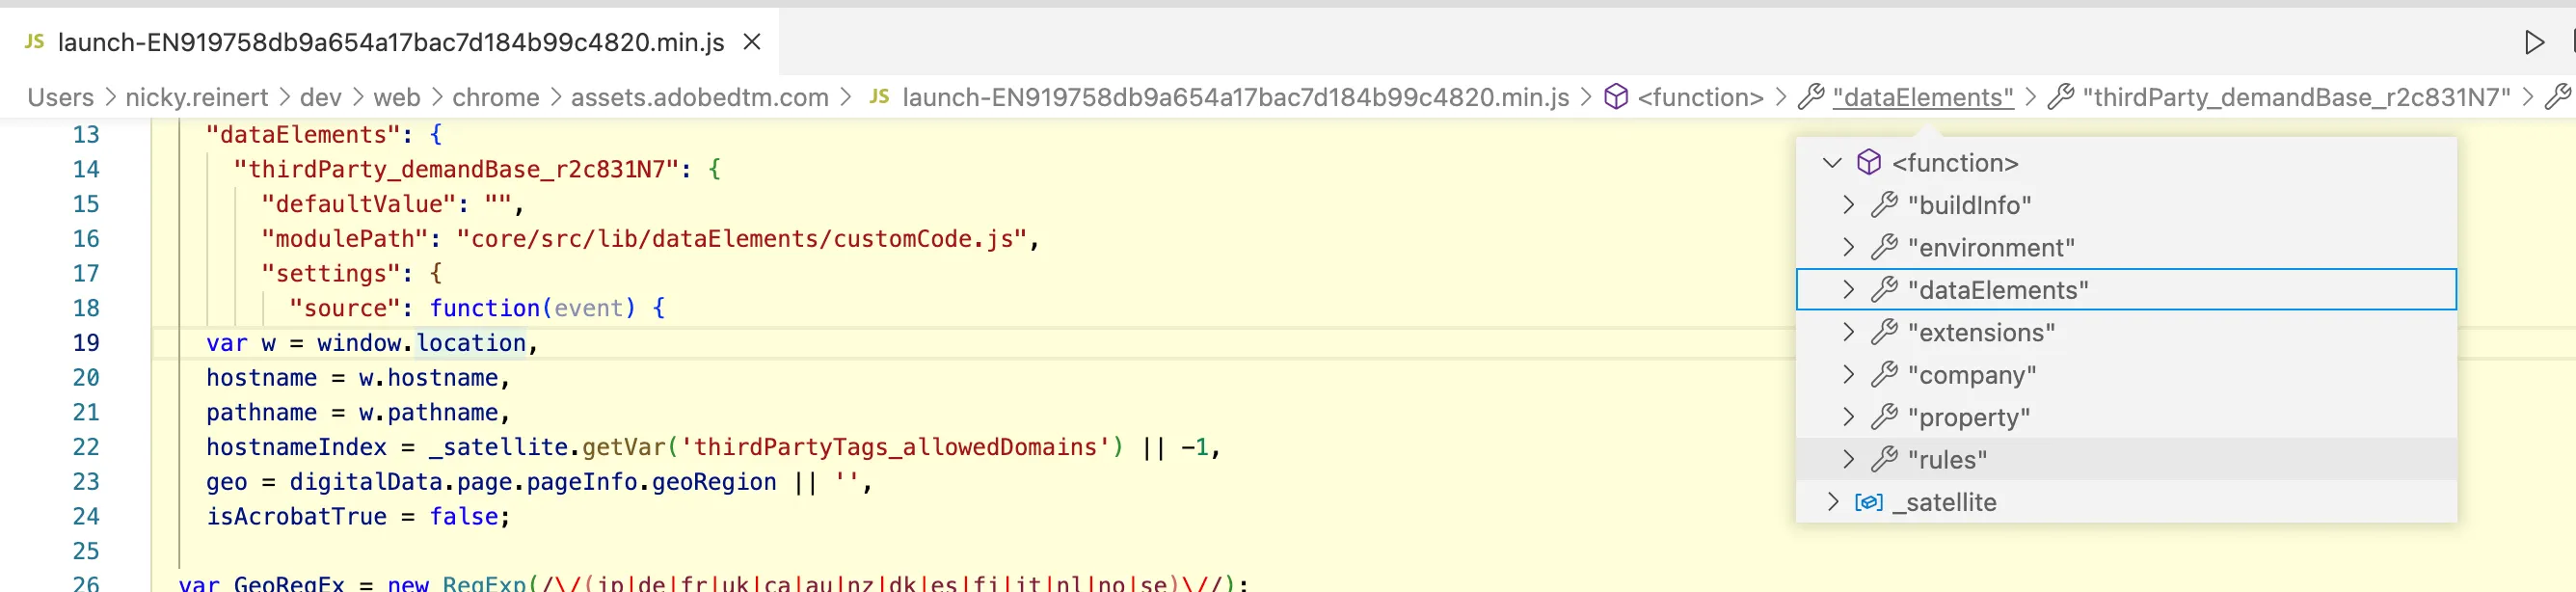
You can now easily edit everything you need inside this file. If you reload the page, Chrome will not load this particular resource from Adobe’s server. Use the top breadcrumb navigation to browse between the different sections, like the rules or data elements:
- If you are done with your modifications, copy the respective code section to your actual Adobe launch tag in the web interface and re-build the library.
Side effect: You can now utilize a version control system for this local file. This also enables you to use breakpoints.
If you’re done with your local development and you re-built your Adobe Launch library, you should de-activate the feature — otherwise the browser will ignore the content from your updated tag.
Enjoy.
Summary
A practical tutorial on how to use Chrome DevTools' Local Overrides feature to manage and edit Adobe Launch tag code without affecting live production.
Main Topics: Adobe Launch Tag Manager Chrome DevTools Local Overrides Web Development Troubleshooting Frontend Development
Difficulty: intermediate
Reading Time: approx. 5 minutes